Vehicle shows illuminated EML but owner claims no loss of power nor any other symptoms.
A quick global scan revealed the fault code P0491 for secondary air injection system bank one, insufficient flow short with power – intermittent.
A basic inspection of the engine bay revealed that the inlet pipe to the motor assembly was no longer fixed to the air filter box, indicating that someone may have already taken a look at this fault.
Plastic pipes on a vehicle of this age have a habit of going brittle leading to cracking, so it was important to make sure that they were all OK at this stage.
I could not see any obvious damage, so I moved on to the next part of the puzzle: understanding how it works.

For those unfamiliar with this Seat/VW setup, its purpose is to use an electric pump to force additional oxygen into the exhaust system, which can help lower emissions.
It tends to be most active when the engine is cold.
Air injected at this point helps clean up the rich mixture that is present at cold start and raises the temperature of the exhaust to bring the catalytic converter to operating temperature faster.
Once the engine is warm, air can also be injected to assist with unburned hydrocarbons and carbon monoxide.
For most manufacturers, this warming up phase is usually accomplished within two minutes of start-up.
The PCM will monitor the second O2 sensor, which is used to measure catalyst efficiency, for when the converter becomes operational or up to temperature.
If the PCM detects that the catalytic converter is not being heated up sufficiently to become self-sustaining in the period specified by the manufacturer, it will set code P0491 and illuminate a warning light.
P0491 can be triggered by a number of things so it was time to put an action plan into place.
Possible causes of a P0491 code
- Faulty exhaust manifold check valve
- Fuse or Relay for secondary air pump
- Air pump failure
- Vacuum hose leak
- Vacuum control valve
- Leak in the hoses to the pump and to the secondary air valve
- Secondary air pressure sensor (not fitted to all vehicles – refer to technical information)
- Secondary air injection ports may be clogged
I had already been over the pipework to the exhaust and the intake box and was happy that these were OK.
Visual checks on the vacuum pipes to the control valve were visually good, although if I had a Mityvac to hand I would have confirmed that the pipes were able to hold and sustain a vacuum.
Still, most scan tools will allow some form of actuator activation when they are connected.
Different scan tools will allow different levels of activation.
Some will let you select individual components, while others will run a program which will operate the components in a specific order.
My current tool used the latter process, meaning that some patience was required as the cycle had to be restarted each time I wanted to run a test.
From this investigation, it became clear that there was no response from the secondary air pump when the scan tool attempted to activate it.
I heard the relay click, suggesting that the signal from the ECU to the relay was good.
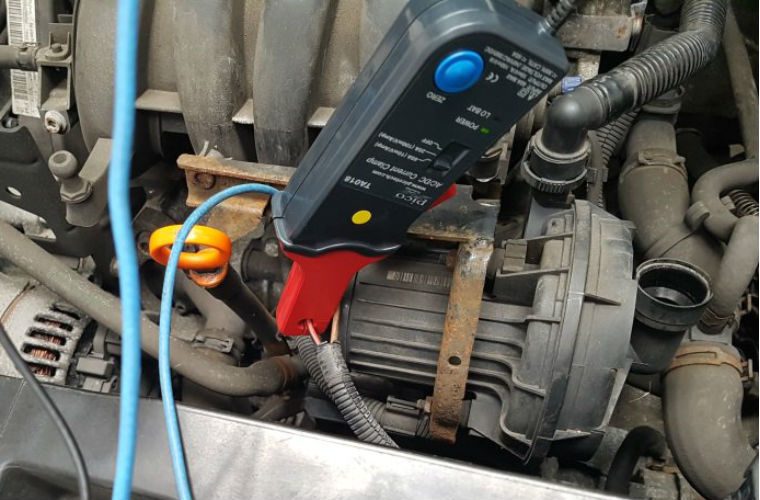
The next checkpoint would be the electrical power – it was time to connect the PicoScope.
All I needed to see was voltage and current at the pump.
With the scope set up, I ran the actuator test again and waited for the air pump: nothing.
No voltage and no current.
Well, that would definitely stop the air pump from running.
Next, I needed to see if the motor was even likely to work.
I made a simple connection to the battery, saw the motor spin to life and heard the characteristic hoover noise.
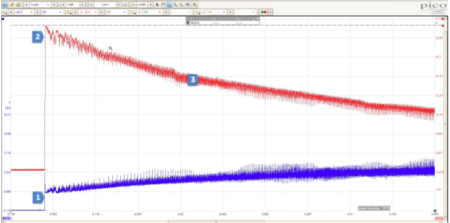
The waveform, however, displayed some interesting results.
The sporadic current flow through the commutator on the air pump is clearly visible.

1: Voltage at pump. 2: Current at pump. 3: Noise and sporadic current draw.

1: Drop in current. 2: Non-uniform current draw.
There was clearly something wrong with this motor but I needed to turn my attention back to why the command to turn the pump is present, yet nothing was happening at the pump.
Time to find the relay.
I did not have access to a wiring diagram, so I resorted to using my senses.
When activating the air pump, the relay can be heard clicking from under the bonnet.
I removed the under-bonnet fuse box lid and touched the relays.
I quickly found the one that was being activated.
I removed the relay and carried out a quick voltage check.
Relay voltage
There was battery voltage present at terminal 30 and at 86 with terminal 85 switching from 5V to 0V when the air pump was activated.
I applied the jumper lead I had used earlier to terminal 87 and to the battery voltage.
The motor started up.
I now removed the top of the relay which revealed that it had indeed burnt the contact point out and was no longer making a connection.
I was still not convinced, however, that there wasn’t an underlying problem with the motor that could have caused the relay to burn out.
In order to investigate further, I decided to fix the relay temporarily by cleaning it and add a little dab of solder to confirm the cause of the DTC.
With the relay sorted and refitted, the actuator test caused the air pump to spin into life and the DTC was cleared.
It also became clear that my current clamp no longer was suitable for our measurements as it was now pulling about 60 A at times.
I did a quick swap of the clamp and an adjustment of the settings to get the full capture on the screen.

1: Long downward spike from drop in current. 2: Sporadic current draw.
The downward spikes in the current draw at marker one indicate a momentary drop in current flow.
With this type of uneven current draw, I informed the owner that there may be further problems with the motor in the future and it may be down to this issue that the relay failed in the first place.
This is a way to make sure that if the motor assembly does fail, you have the documentation to prove that the work you’ve done pointed to a potential failure in the future, as the symptoms would be identical to the original complaint.
In this instance, no parts were replaced and at present, the vehicle is performing as expected with no more warning lights on the dashboard.
The customer has been informed that the relay does need to be replaced as it is temporarily repaired, but ultimately the owner is aware of the possible concerns they may face in the future.
For further information about PicoScope, click ‘more details’ below.


