BTN Turbo, an aftermarket distributor of turbo chargers, has advised those fitting new turbos to first identify why the last one failed before replacing it, and have published a guide on correct installation.
Why did the last Turbo fail?
More than 95 per cent of failures are caused by the following issues:
• Oil starvation – can be the result of: blockages (e.g. carbon deposits, silicon on gaskets, kinked pipes), leaking pipes, low oil level, worn oil pump or lack of oil priming when the turbo was fitted.
• Oil contamination – can be caused by: fuel, water, swarf or carbon deposits, overdue oil or filter change, incorrect or poor quality oil or filter, and malfunctioning filter bypass valve.
• Foreign object damage – can be due to: leaks in the air intake system, fragments remaining from the failed turbo, washers, gasket material, rag particles in the air intake; even a very small object can cause severe damage.
Other potential causes of turbo failure:
• Prolonged engine idling – can create a vacuum which damages the turbo seals.
• Hard acceleration from cold start up – insufficient time for oil to protect the turbo.
• Hot engine shutdown – produces carbon which damages turbo bearings.
• Exceeding the engine rev limit – will overspeed the turbo beyond the oil’s ability to protect it, and produce overboost which damages the engine.
The majority of turbo problems are oil related, BTN Turbo has said, so technicians must check the lubrication system before replacing the turbo.
Fitting the correct turbo
Accurately identifying the turbo needed saves the time, trouble and expense caused by receiving an incorrect unit – fitting the wrong turbo can invalidate its warranty.
BTN Turbo usually identifies the correct turbo from the vehicle’s registration number.
However, the most accurate identification is to use the details on the nameplate or label of the failed turbo; you may need to remove it from the car.
The nameplate should tell you at least one of the following: the turbo model, the turbo manufacturer’s part number, or the vehicle manufacturer’s part number.
The vehicle manufacturer may have installed a different turbo during the production run, and the turbo manufacturer may have changed the specification.
Installing the new turbo
Before starting any installation:
• Make sure you know why the original turbo failed, and rectify the fault.
• Some turbos come with critical fitting instructions, such as oil pipe replacement, which must be followed for a successful installation.
Check inside the FitKit bag for these critical instructions; failure to follow them will invalidate the warranty.
• If your turbo has a wastegate or is a variable turbine turbo, it will be factory pre-set to suit your vehicle.
Do not attempt to adjust it. This will compromise performance and invalidate the warranty.
Replace any failed or suspect parts with OE parts.
1. Check the air intake pipes and exhaust manifold to make sure they are free from contaminated and loose material, so no dirt or debris enters the turbo.
2. Check the oil inlet and drain pipes are clean and free from obstructions, internal carbon and sludge.
Clean or replace if necessary. Replace the engine oil and filter, remembering to prime the filter.
Use only OE standard parts and the oil specified by the engine manufacturer. Do not overfill.
3. Check the exhaust mounting range is flat and free from cracks and carbon debris, and the studs are in good condition.
Check the manifold casting is not cracked on the outside or breaking up internally. If in doubt, replace with a new part.
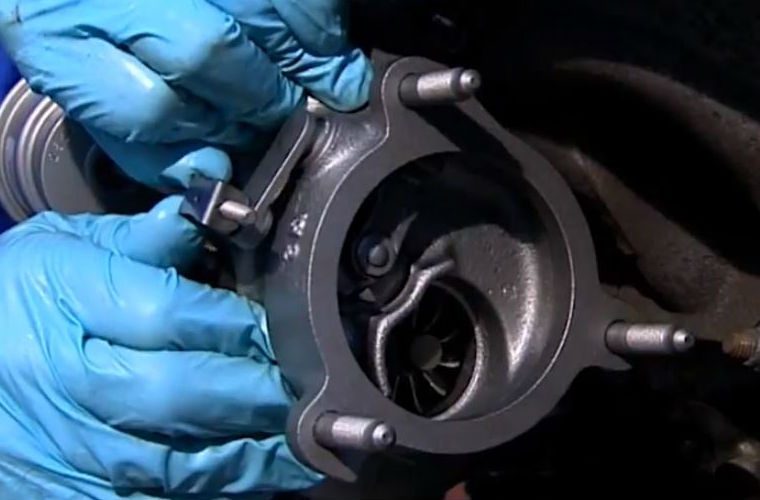
Mount the turbo on the exhaust range, checking the turbine gasket fits correctly to give a gas-tight seal.
4. Connect the oil drain pipe, prime the turbo by filling the oil feed hole with clean engine oil, using the oil-filled injector from the FitKit supplied with a BTN turbo.
Rotate the rotor assembly by hand, to ensure the oil protects the bearings.
Connect the oil feed pipe to the turbo. Lack of oil priming during fitting, and incorrect starting procedure, can cause premature turbo failure.
Connect all other external fittings to the turbo.
5. Make sure the engine oil circulates and the turbo is thoroughly lubricated before it operates under load.
Disconnect the ignition system or fuel supply, so the engine turns over without firing up.
Check the oil pressure warning light goes out and reconnect the ignition or fuel supply and start the engine.
Run it at a fast idle while you check there are no diagnostic fault codes, or oil, air, exhaust gas or fuel leaks.
The replacement turbo should now provide long and reliable service.
To find out more about BTN Turbo and its solutions for independents, click ‘more details’ below.


