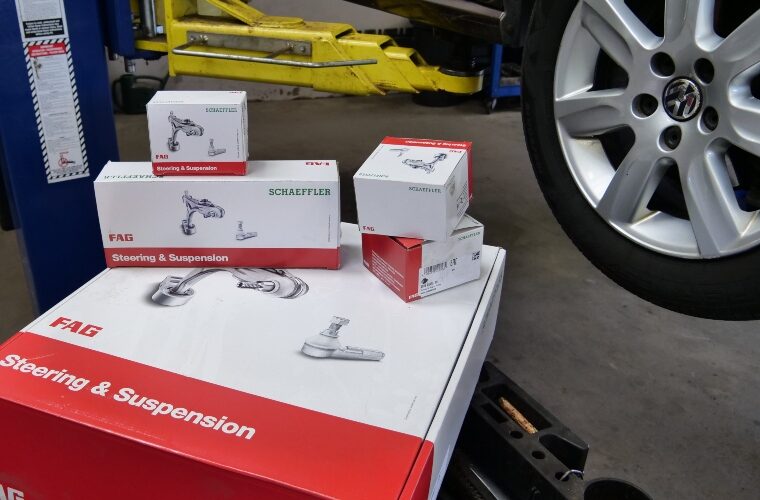
The FAG steering and suspension range provides independent workshops looking for quality parts with the ideal solution, as the unique technical features, along with the premium fit and finish, ensure a best-in-class repair.
Designed for all key applications in the UK car parc, the range follows Schaeffler’s philosophy of providing installers with a complete repair solution, which means that every box includes all the required ancillary components – nuts, bolts, washers and clips etc. – so technicians can complete a safe and professional repair from the contents of just one box, with no hunting round or waiting for missing parts to arrive.
The replacement of track control arms (TCA), which are also known as bottom arms or lower wishbones, is becoming an increasingly common repair, as the rubber bushes wear or can become soft.
Also, ball joints are now commonly riveted in place, so replacing the track control arm assembly can be a more economical repair.
The scheduled workshop time to replace a TCA on a Mk.V Polo from 2009 onwards is 0.9 hours, plus a wheel alignment check, so can be a profitable job for the independent workshop.
Recommended workshop equipment:
• Vehicle lift (two post is ideal)
• Hydraulic transmission jack or engine support
• Ball joint extractor tool
• Torque wrench
With the vehicle placed safely on the ramp, slacken the wheel bolts, raise the ramp to waist height and remove the bolts and the wheel.
Use a penetrating oil and a wire brush to clean the ball joint threads and lower arm fixings.
At this point it’s also good practice to assess the level of brake pad wear and make a visual check of the condition of the hydraulic brake hose, as well as the vehicle’s other suspension components.
Remove the lower ball joint locking nut and then use a ball joint extractor tool to separate the ball joint from the hub carrier (picture 1).
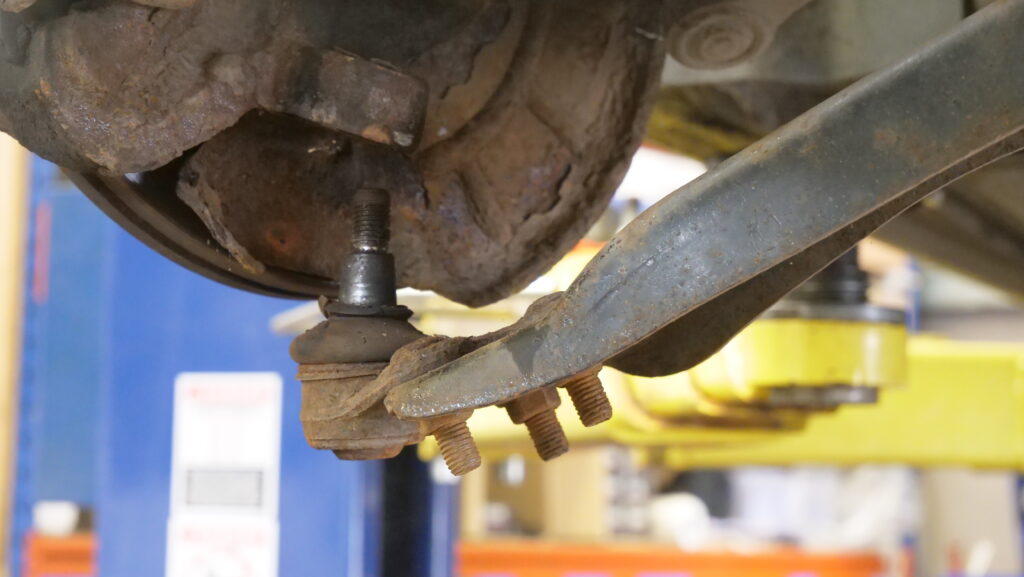
Then remove the rear lower vertical arm bolt that attaches the back of the arm to the subframe, followed by the remaining fixing bolt.
On this vehicle it was the O/S lower track control arm that was being replaced, a process that’s a little more difficult than the N/S, as this final bolt will not pass the oil sump (picture 2 & 2a) without having to raise the engine a little.
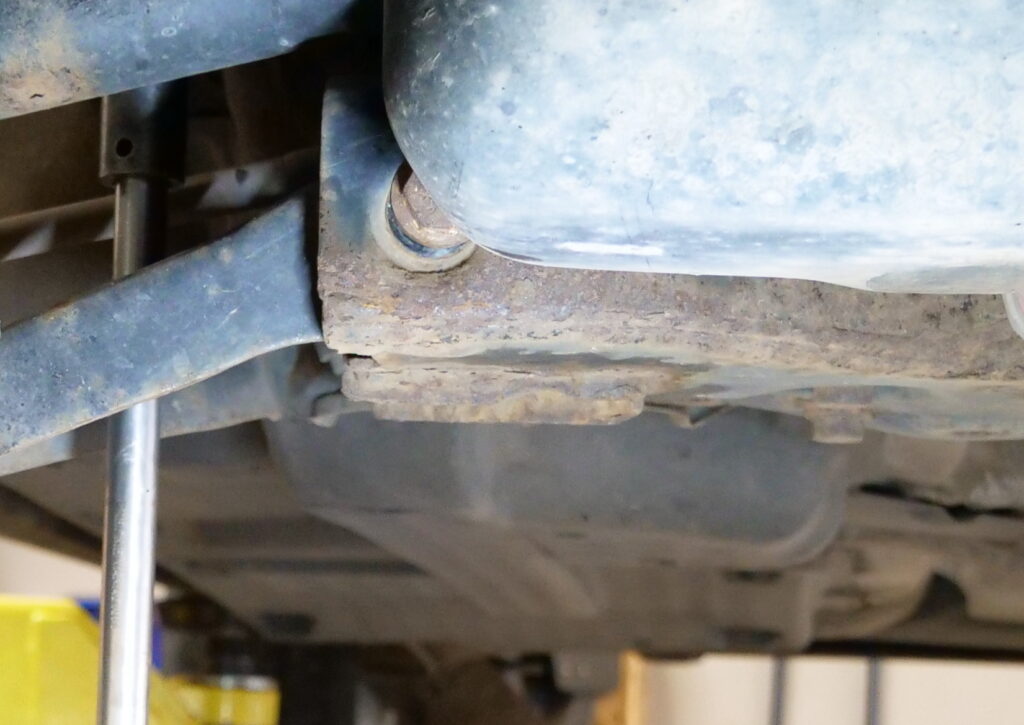
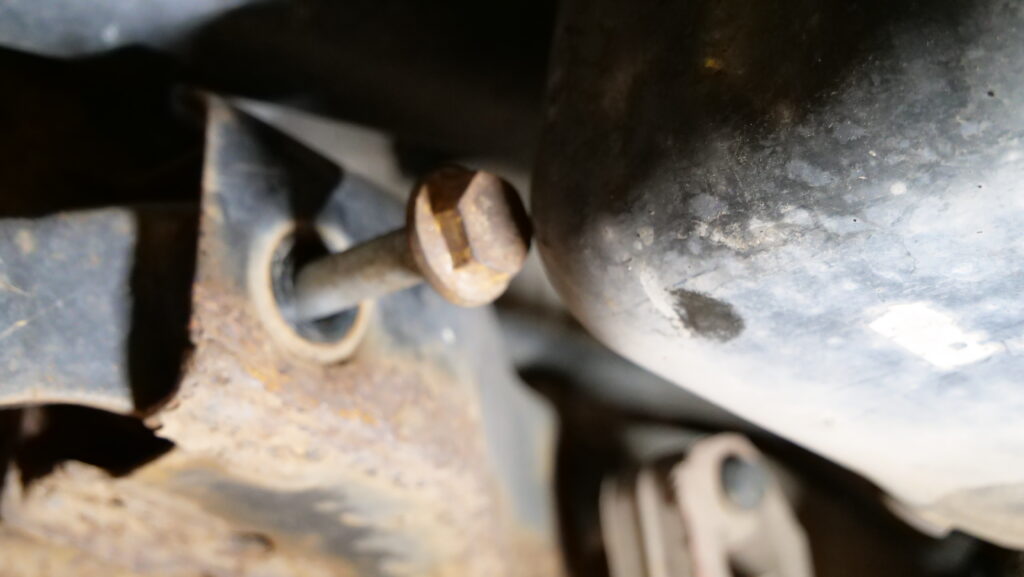
To do this, release and remove the nut securing the engine mounting to the chassis mounting (picture 3), support the engine with either a transmission jack or engine support in a suitable location that won’t damage the sump, and then raise the engine enough for the bolt to slide out and pass the engine’s sump.
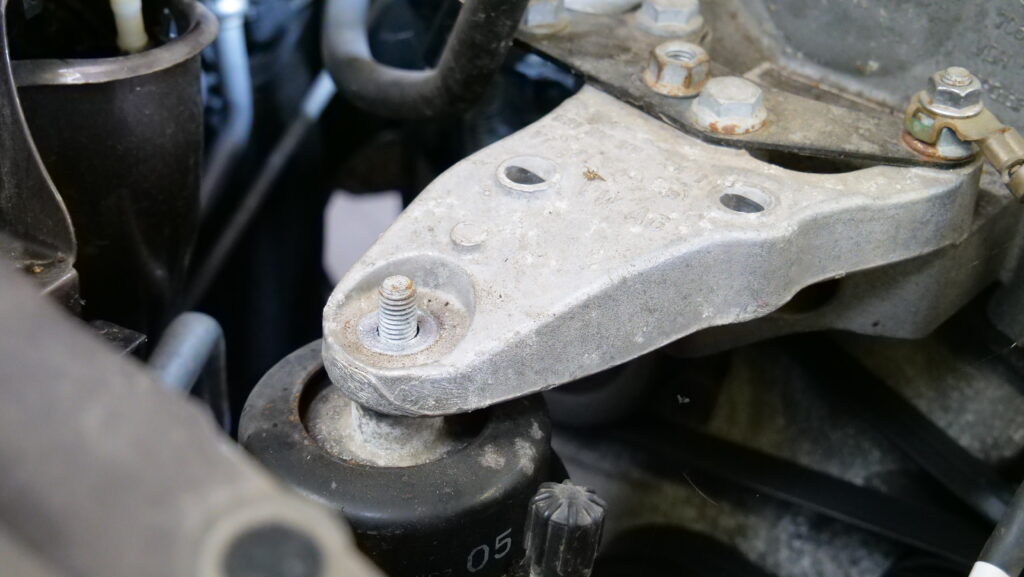
Once the bolt is removed, the old control arm is free to be detached and discarded, and while the engine is still supported, offer the new arm from the FAG steering and suspension kit into place and secure it by hand, using the new bolts that are supplied within this complete repair solution.
After securing the fixing bolts, lower the transmission jack and resecure the engine mounting, tightening it to the vehicle manufacturer’s (VM) specified torque value, but remember that, to prevent unnecessary strain on the new rubber bushes, the bolts that secure the suspension bushes should only be fully tightened when the suspension is in its working position.
Locate the ball joint into the hub carrier and, taking care not to pinch the protective boot, tighten the nut to hold it in position.
Then refit the wheel and lower the ramp to the ground.
Once the vehicle is on the ground and the suspension is in its working position, fully tighten the lower control arm fixings and ball joint nut and torque to the VM specification.
Finally, torque the wheel bolts to the VM specification (picture 4).

To ensure a complete and thorough repair, Schaeffler recommends that any vehicle that undergoes a steering or suspension component replacement should subsequently go through a wheel alignment check, to make sure its tracking is correct before being handed back to the owner.
Information on Schaeffler products, fitting instructions, repair times and much more can be found on the REPXPERT workshop portal, the REPXPERT app, or by calling the Schaeffler REPXPERT hotline on 0872 737 0037.

